How close should i go ??
I don’t usually write about Photography and its technical sides, there are far more experienced and skilled people to do that. But one question I always have struggled with is ” HOW CLOSE TO THE SUBJECT DO INEED TO BE FOR GETTING A GOOD PRINTABLE PICTURE ?”. Over the years as I kept clicking at various scenarios I have realised that there is no definite answer to this question but there are some guidelines to achieve a good picture using a few factors
- Equipment : Camera, Lens, Extenders, Tripod
- Ability/Skill : Approaching the subject quietly , crawl, Photography skills
- Timing : Light availability, Dew factor, Heat waves etc.
- Size of Subject
- Type of picture : Portrait, Action, Habitat
and Understanding of what size of image is possible at the distance from the subject
For the purpose of this discussion I have used a 500mm Lens along with a 2 X extender and a 1.4 X extender
Before understanding how close should one go, lets find out why are we looking to go near. The basic idea is to capture as much of the subject as possible so that we can get a very good image size.
Understanding Image Size :
My full frame camera ( Canon 1 DX Mark 2) has a sensor that gives a picture of dimension 18.24 Inches X 12.16 inches which at 300 PPI (pixels per inch) result in 19.96 Mega pixels
So when I get a “Full Frame Shot” , I can print a 18 X 13 size of print approximately.
But we know that we do end up cropping a lot of unwanted areas from our images because it is not always possible to get Full frame pictures.
So lets say I have cropped the picture in such a manner that I have a picture of 10 inch X 8 inch ….This at 300 PPI will translate into 7.2 Mega Pixels
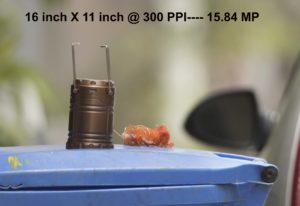
So from 19.96 MP I have now reduced the picture to 7.2 Mega Pixels , more than 60% drop. But when I need to print something on a art paper the usual size is 16 inch X 11 inch and this on 300 PPI translates to 15.84 Mega Pixels…
So how do I make my 7.2 Mega pixel go upto 15.84 Mega Pixels .?
The answer lies in the Photo editing software and the function called “Pixel Filling”. Softwares like Photoshop will use sophisticated algorithams to understand the nature of pixels in the smaller Size photograph and then enlarge it to the required size by filling in the extra pixels. More the pixels you fill , the quality of your picture suffers.
For a given size of print say 16 inch X 11 inch , to ensure that you do not have to fill in more pixels , you have to minimize the cropping and to minimize cropping you have to get near the subject.
So the importance of the question :” how close should one go ?” is established.
To find out some result that can be replicated in controlled method, I have done a small experiment.
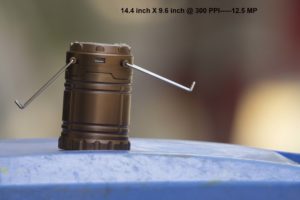
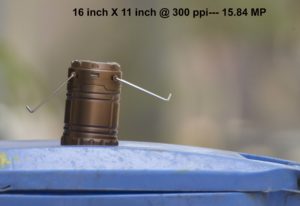
I have shot pictures of a Subject ( a Lantern) of size 15 cm ( Average size of most birds) from fixed distance of 80 feet, 60 feet and 40 feet. I have used 500 mm Lens with a 2 X converter on a full frame and also repeated the test with 500 mm lens on 1.4 X converter on a full frame camera.
I have compared the uncropped picture with a cropped version that I would like the frame to be as and then converted the cropped version to 16 inch X 11 inch. This has been done at all three distances to understand which distance is optimal for what reach.
Lets start with following Set up
Full Frame Camera + 500 mm + 2 X converter = Effective reach ( @ 35mm ) of 1000 mm
at 80 ft : Reach of 1000 mm
Full frame no Cropping: 19.96 MP

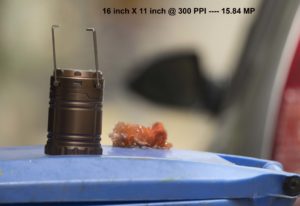
Image cropped so that the desired frame is got. This reduces the size of the picture to 9.9 inch X 6.5 Inch …@300 PPI it is 5.8 MP
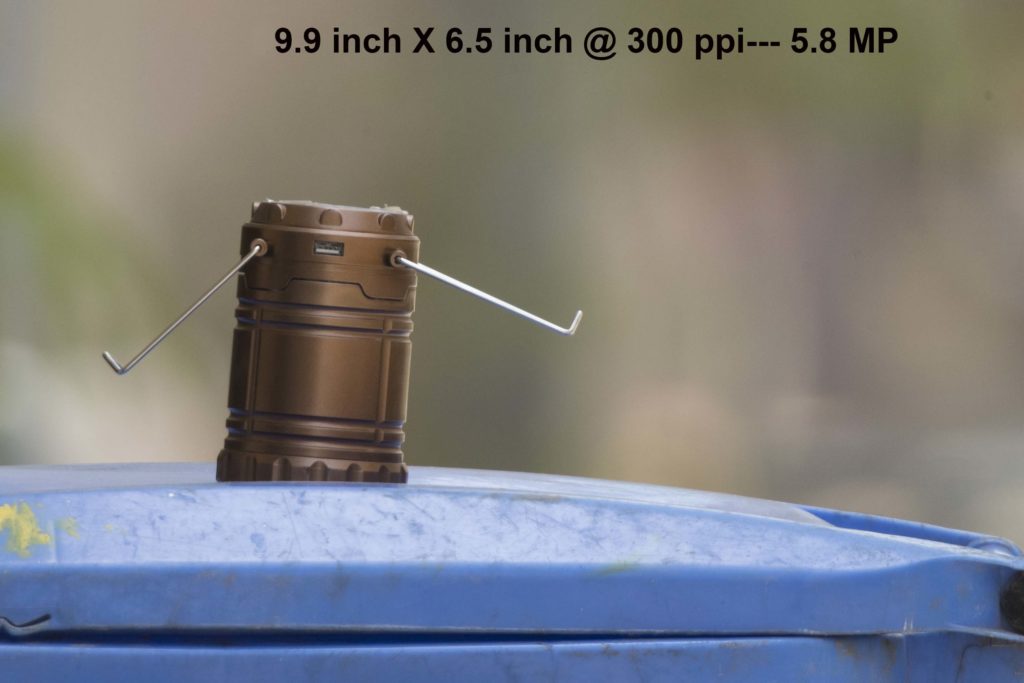
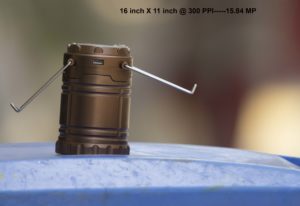
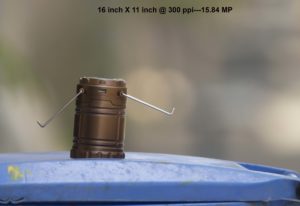
Converted the above cropped image to fit 16 inch X 11 inch …@ 300 PPI it translates to 15.84 MP

so from 5.84 MP I have blown it up 3 times approx. to 15.84.. The Pixel filling is visible when you download and see these images at 100% . magnification.
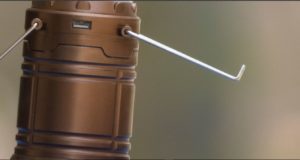 Full Screen No Cropping..
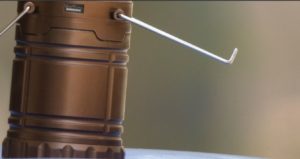 Full Screen Cropping to 5.8 MP
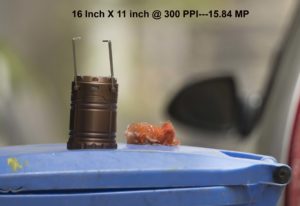
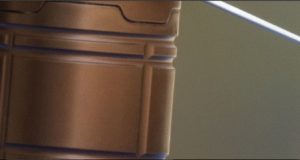 Full Screen Cropping and pixel filling to 15.84MP
As we see them at 100% Magnification we can see that the picture quality in last Image has substantially gone down.
So at 80 ft with a reach of 1000mm for a subject of size 15 cm in height the best portrait you can get is a picture of 6 MP approx. We can always have a difference of opinion on how much to allow for the Background or habitat into the picture but a 20% +/- we can see that the max size would be 6-7 MP.
so if I have to print 16 Inches X 11 inches at 300 PPI what distance should I be in with a 1000 mm reach
Lets compare the pictures of 16 inch X 11 inch at different distances with the original cropped versions
Cropped Images
40 feet :12.5 MP 40 feet : 16 X 11 inches — 15.84 MP
Ratio at 40 feet : 12.5/15.84
60 Feet : 11.7 MP 60 Feet : 16 X 11 inches — 15.84 MP 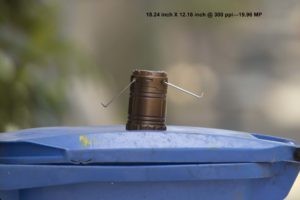
Ratio at 60 Feet : 11.7/15.84 MP
80 feet : 5.8 MP 80 feet : 16 X 11 inches –15.84 MP 
Ratio at 80 feet : 5.8/15.84
So to get the best possible picture ( Portrait) of a bird of size 15 cm height with a reach of 1000 mm I need to be at 40 feet from the bird. But even if I am at 60 feet I get a very good picture ( 11.7 MP vs 12.5 MP).
In my opinion if I am anywhere in the range of 40-60 feet of the subject , with a 1000mm reach I will get a good picture that can be blown to 16 inch X 11 inch without any noticeable loss in quality.
I have done the same with a reach of 700 mm : Full frame + 500mm + 1.4x TC
Results are
Cropped Images
40 feet :10.5 MP 40 feet : 15.84 MP

Ratio at 40 feet : 10.5/15.84
60 Feet : 6.8 MP 60 Feet : 15.84 MP

Ratio at 60 Feet : 6.8/15.84 MP
80 feet : 4.2 MP 80 feet : 15.84 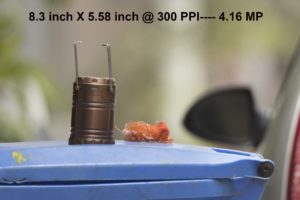
Ratio at 80 feet : 4.2/15.84
So to get the best possible picture ( Portrait) of a bird of size 15 cm height with a reach of 700 mm I need to be at 40 feet from the bird. This is 20 feet less than what I need with 1000mm reach
So the 2 X extender helps you by letting you have another 20 feet distance between you and Subject .
This whole exercise was done by me to understand that for a bird( Other than Raptors and Bustards), if I am not at atleast 60-70 feet with a 1000 mm reach I would get pictures worthy of Digital posting only. To get to print them I need to be at atleast 60-70 feet from them
WORD OF CAUTION : I have done these tests in broad day light ( good light), in absence of any dew or heat waves. The dew/heat waves can also effect your pictures adversely and you may have to get closer than this distance in such conditions.
Always use TRIPOD wherever possible. At 1000mm reach there is shake even at very high speeds espl. if you have been shooting for a long time. Wherever possible spend those 5 minutes fixing the tripod, it is time worth investing
How do I ensure that I go within this optimal distance of the bird ?..
There are different techniques , some I am listing below
Sit in Vehicle : Birds do not usually see Vehicles as hindrances. Each bird has a circle of Comfort and it will allow you to approach it till the limits only. But with a vehicle this zone is smaller than compared to a human on foot. When in a vehicle always keep your camera ready on the window or any opening before approaching the bird. Be quite and switch off the vehicle engine a fair distance from the bird without hard braking and let the velocity of vehicle lead you towards the bird. Do not attempt to open any doors espl. the ones facing the bird and avoid all sudden movements.
Crawl : This is perhaps the best way to get close to a bird but it is also very tiring .You need to be physically fit and also ready to face some bruises and cuts. Approach the bird in a vehicle till its comfort zone outer limit . Then get down from end opposite to the vehicle , Let the vehicle drive away from the bird, and then you start crawling. It is very important that you don’t get up so if you are tiring then just lie down for a few seconds before crawling again. I wear a Full hand shirt and use the Knee caps used by ” Kabaddi players”. If you can take a light bean bag with you that will be of great help. For crawling , Single person is Heavenly, Two people is company, Three persons is the limit : More than 3 you need to be extremely lucky to get close to the bird.
Stalking / Hide: This is a game of patience and Luck. Once we are aware of the area and perches the birds use, we can set up a hide and sit there for the birds to come. For this we need to be in position well before the time the bird will come, this can mean before dawn also.
Always approach the bird in a Zig-zag fashion. Never approach it head on. Never look at it directly if you are approaching by foot.
These techniques can help you reach a closer distance to birds. Never be greedy, if you have reached the required distance take your pictures before pushing your luck.
Now with this awareness of distance I am sure I will be able to gauge what kind of picture I would get .
Note :
- There is nothing wrong in getting images suitable for digital media only. After all 90% of our Picture exchanges and viewing is on digital front.
- Other way to increase your Picture size from current size is to reduce PPI.
- example : a 8 inch X 5.3 inch crop @ 300 PPI is 3.8 MP. So when we blow this to 16 inch X 11inch @ 300 PPI we will get 15.84 MP . That is too much of pixel filling. Instead if we enlarge it to 16 inch X 11 inch @ 200 PPI then we get 7 MP , which is comparatively lesser Pixel filling hence better quality. With todays printing technology we can get excellent prints at this PPI.
Pictures : Saravanan Janakarajan